
Seamless & secure ticketing software and guest registration with Tickets
BETA - Our visitor registration software makes visitor management easy for you and your guests. Whether you want to send invitations or RSVPs for your wedding, manage guests for your corporate event or sell tickets for your festival. It's all possible with our event registration software.
How to use Tickets for visitor registration and management?
Tickets' by eventplanner.net is designed to simplify the ticketing and visitor registration process for all kinds of events. The software is perfect for organisers looking to streamline their event entry process efficiently, it includes a user-friendly ticket scanning app.
To use the Tickets, you must first create an event. Once you've done this, you're good to go.
Creating a new event can be done directly from the mood boards page, which can also be accessed via the 'event software' link in the header of our website (if you're logged in), or via the 'add to new event' link whenever you like a business page or save a post.
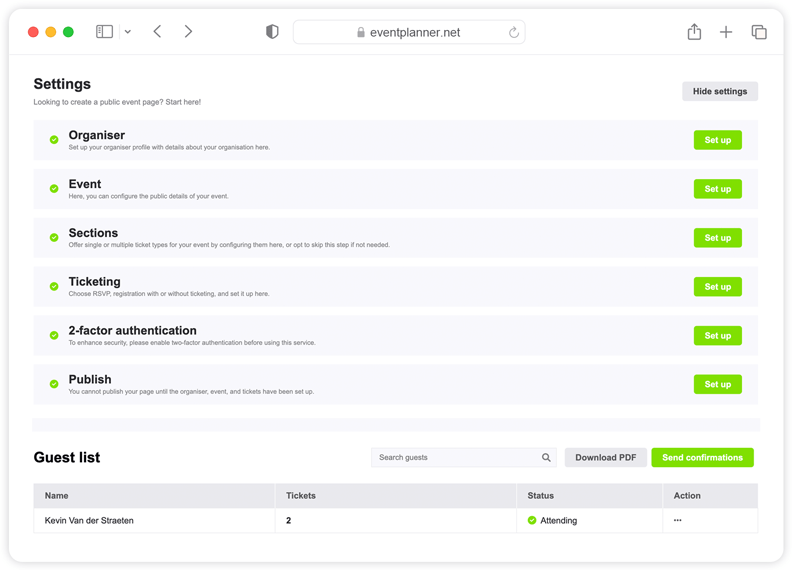
Organiser information
The first thing you need to set up is the organiser information. Click 'Set up', and a window will pop up. Once you've completed the fields, click 'Save'.
Event information
Next, you need to set up your event information, so click on 'Set up' on the Event row. We start by entering some basic information: the event name. You have already set that previously when setting up your main event profile, but you can change it here if you want to display a different name to your audience.
Then enter some details in the event intro text, such as what will happen during the event, why it's important, and the outcomes the attendees can expect. This is just an introduction, so two to three sentences will suffice. We’ll be writing a more detailed event description shortly.
After you've completed the event intro, enter the relevant start date and time (and end date and time)
Important! Be sure to set the right time zone for the event destination.
You have three location types to choose from: a physical event, an online event, or both. If choosing an online event (or both), you will need to enter a URL. When choosing a physical event, you need to enter the address.
Once you've entered the details, the map automatically finds the address and puts a marker in the location. You can move this if it's not completely right.
Then we need to upload some images: a cover image and a preview image. Please ensure you use high-resolution images because customers will see large versions of these.
Next, we need to enter more detailed information about the event. If your event features live music, for example, you could give an overview of the performers, the genre of music, and any special details of the show, such as age restrictions and accessibility information.
For paid tickets, it's especially important to include your refund policy in the next field. To be compliant with EU GDPR legislation, you should also include a URL to your privacy page so that customers and attendees know what your privacy policy is. If you are processing or storing customer data, you require consent from the customers. Select 'Yes' or 'No'.
Then we need to head to Sections and click 'Set up'. This particular section isn't mandatory because many events don't have sections (which are essentially different types of tickets, such as a particular time slot or designated areas). Here, you'll see three options to choose from:
- Zone
- Time slot
- Zone and time slot
If you have an event where you sell tickets for regular customers and VIP customers, you can set those zones here. If you have multiple stages, you can set them here too.
A section can also be a time slot. For example, if you have an event that runs across multiple days, you can allocate users access to a ticket for just one of the days or offer a combi-ticket. You can even make combinations between a time slot and a zone, and you can add as many sections as you want.
When complete, hit 'Save' and head to the next stage, which is Ticketing.
There are some basic settings that we need to set over here. You have three choices available to you at this time. We can do RSVP events when you have a guest list, to send out the invitations and request that recipients respond if they are planning to attend your event.
We also have free tickets, and in the near future, we will also be offering paid tickets through our platform. Once you've selected the appropriate event type, you need to decide if you want to: generate a scannable QR code for each ticket, or automatically send a booking confirmation when somebody registers.
You may not want to do this for some events, for example, if you want to vet the attendees who register before issuing them with a ticket. After this, you can set a registration end date and time, such as ten days before the event at noon.
Next, you can choose whether there is a limit to the number of guests. Select the 'No limit' check box if you want to manually enter a specific number.
You then need to specify what information you require from the ticket buyer. Do you require their address and phone number? As for the attendees, specify whether you need their names and email addresses.
Important! There may be a difference between a buyer and the attendees. For example, a customer may buy three tickets: one for themselves and two for their friends.
You can ask for email consent from the users if you want their permission to send them marketing emails later.
Remember! With ticketing, you are processing lots of data. In this case, eventplanner.net is acting as the platform, but it is your data and you are responsible for managing it.
At this stage, you can also add some bespoke questions to the registration form.
Now it's time to create the actual tickets.
If you created any specific zones earlier, you'll need to create tickets for each of these by selecting 'Create new ticket'. You then need to specify:
- Ticket name
- Custom end date, e.g., early bird tickets
- Quantity (the total amount available)
- Maximum tickets per order
- Description (more detailed information on your event)
This will become especially useful when setting different prices when the functionality becomes available. In the meantime, have a play around with the settings. Once you’ve entered all the relevant details, hit 'Save'.
Next, we move on to publishing the event. Select 'Active'. Please be aware that you will not be able to change certain settings after publishing your event (such as changing the type from RSVP to Tickets).
In the next section (Sharing settings), you can choose from:
- Public event - anyone can access
- Private event - anyone with a specific secured link can access
- Private event - only people with the password can access
Selecting option 2 or 3 will generate a link for your event. If you follow that link it will take you to a checkout where you will see the ticket types you have created. If you follow the process as a customer, you will see that the predetermined rules are in place, such as the maximum number of tickets per customer, the customer information required, and any additional questions you are asking.
The user can decide whether or not to create an eventplanner.net account. That's completely up to them. After clicking 'Purchase tickets', they'll be taken to an order confirmation page.
If we head back to our Tickets page, you will see an updated guest list. In the right-hand column, you'll see some actions, denoted by an ellipsis (...). Clicking on that will reveal some options.
You can change the name, for example, if a user has entered the wrong email address or name. You can select 'Resend confirmation' if, for example, the user didn't receive a confirmation email.
Important! It's worth asking the user to check their spam/junk folder. Occasionally, an over-zealous email client will prevent our emails from reaching customers. If the issue persists, you can manually download the ticket yourself and send it like any normal email.
Our handy eventplanner app comes with a built-in ticket scanner. The app is available for free in the Google Play Store or the Apple App Store.
Free Event Planning Software
Think of all the tools you use when planning truly memorable events: mood boards, checklists, call sheets, ... Now imagine having all those tools in one convenient place!
Discover all tools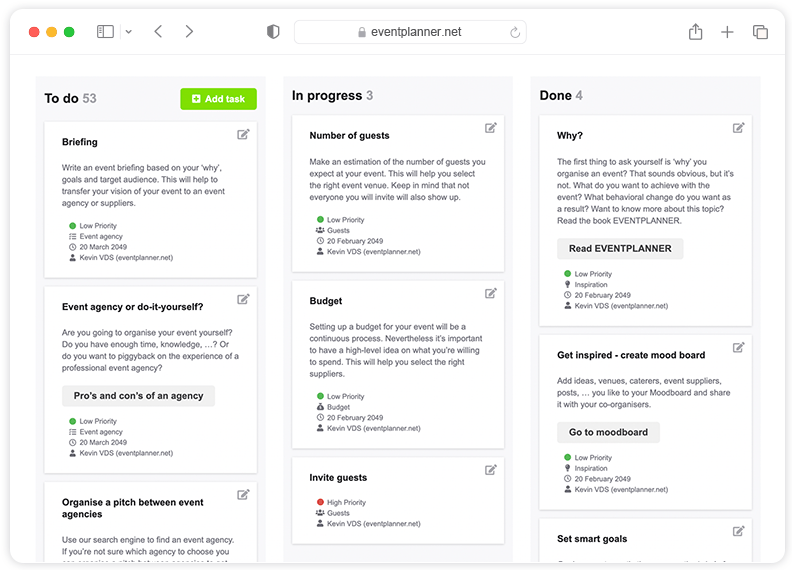

Ticketing software
What is ticketing software?
Event software in general simplifies the management of your events. Ticketing software does this specifically for ticket sales and visitor registration. You can enable ticketing software for all types of events, from large outdoor music festivals, corporate events, cultural festivities, online events, to club evenings, fairs, sports competitions or your wedding and an evening activity of your local association. Events from large to small, from complex to simple, from paid to free, public or private.
eventplanner.net developed Tickets, the smart and innovative ticketing software you need to set up your ticket process online and manage it yourself from A to Z. Our mission is to help you easily organise events.
No tickets or invitations, no event
Tickets or entrance admissions are a crucial part of your event organisation: without tickets, there is no event because there are no guests and no audience present. Tickets are also more than purely practical tickets or a process that you as an event organiser want to organise as efficiently as possible. A ticket is the very first tangible thing your audience and guests receive from the experience you will create for them. So make your ticketing process as memorable and frictionless as possible. And you can use Tickets, the free ticketing software from eventplanner.net, perfectly for this. And the icing on the cake that you achieve with a high-quality event ticketing software: you offer your customers or guests the best service during the first part of your event.
The benefits of event ticketing software Tickets
With event ticketing booking software you achieve several goals at the same time. With an integrated event ticket software, you streamline the entire ticketing process in a smooth and secure way so that you and your team work efficiently, from ticket setup, the online ticket sales and payment process to the scanning your guests or visitors via the handy event planner app at your event itself. Challenge repetitive, manual actions that cost you a lot of time (and money). With an event ticket system you not only work efficiently, but also easily. Tickets is an integrated, complete event management and ticketing software. So you no longer have to switch between different tools. In addition to ticketing, it is also possible to send personal invitations to guests who can easily let us know via an RSVP link whether or not they can attend your party, conference or event.
Moreover, you work with Tickets tailored to your event. If you offer different types of tickets (for example tickets for certain zones or time slots, VIP tickets, combination tickets, Early Bird tickets, etc.), you can program these in your ticketing software. And if you use Tickets, you have real-time insight into, for example, your guest list at a glance. This and other data offer you valuable insights at the time of your event planning itself, but also to optimise your future events and your marketing strategies.
And last but not least, you work with the professional and reliable event ticketing software from eventplanner.net. Reliable and designed in such a way that you comply with the GDPR and privacy regulations regarding the collection of personal data. eventplanner.net is also ISO27001 certified, so your data is in safe hands and you can rest easy. Our mission is to help you plan and manage events of all sizes with confidence and in a simple way.
From ticket sales to an access control system
Tickets offers all the necessary functionalities for efficient ticketing and guest registration.
Off course you want to maximise and boost your ticket sales at the right times. In a way that completely suits your event. Tickets makes ticket sales easy. With several features available such as setting up different ticket types and the super secure payment module from our partner Stripe so your customers can pay for their tickets with a payment method they trust (for paying tickets).
With the efficient visitor registration that Tickets makes possible, you can accelerate the registration process of your visitors or guests. You automatically collect the necessary information about your participants via the registration forms, taking into account the data you need. With Tickets you also have an access control system, which not only ensures that you have a well-organised event, but also a safe event.
Scan tickets when your visitors arrive? Yes you can with our ticketing software Tickets. Efficiently streamlining your access process for your event also means scanners that simplify access control by quickly and efficiently scanning tickets at the entrance to your event. No worries, Tickets includes a user-friendly app for scanning your tickets, with a built-in offline mode if the internet connection is lost during your event.
Ticketing software from eventplanner.net: an integrated event software package
All the tools you use as an event organiser in one place? It's possible! With Tickets, your free event and ticketing software. And there's more! Also other tools you and your team use to plan memorable events, such as Moodboards, Project Management, Event Callsheets and Budgets are included in one package in the event planning software from eventplanner.net. So handy!
Start selling tickets immediately via eventplanner.net's ticketing software
No time to waste? To use Tickets, you only need to create an event in the eventplanner.net event software. Done? Then you will be ready in no time to start using your digital ticketing software for ticket sales and visitor registration. Good luck with it!